Showing posts with label cherry. Show all posts

April 18, 2015

Orphan Black Forest Cupcakes


Who's excited for the season premiere of Orphan Black tonight?

Memememememememe!

If you guys haven't heard of Orphan Black before-- do you live under a rock or something? It's the sci fi thriller about the clones, starring the absolutely redonk acting talent of Tatiana Maslany. Seriously, every time I see that woman, I always have this brief moment of wondering which one she is, and then I remember she's not actually cloned. There's only one of her. Or so they tell me. I'm not completely sure I believe it.


Clone dance party!

And there are boy clones now, which means double the clone-y goodness.

I've had the idea of doing Black Forest cupcakes for Orphan Black for a while now, because the name just works (Orphan Black, Black Forest, Orphan Black Forest), and because cupcakes are kind of like clones of each other.

I totally just blew your mind, right?
Cosima and Delphine think it's a scientific breakthrough.

Just making Black Forest cupcakes wasn't enough, though. I needed to decorate the cupcakes somehow, but I couldn't think of any sort of recognizable symbol from the show, except for Tatiana's face and that's not something I felt I could put on a cupcake.

So I went a bit... deeper.
Cloned DNA. Obvi. (I've decided the pink ones are the Leda clones and the orange ones are the Castor clones)

Putting DNA on the cupcakes was really simple. (Excuse me while I giggle to myself) (Shut up, that was totally funny) You just take two strands from Pull 'n Peel Twizzlers (I used fruit punch flavored, which is why they're different colors, but any kind works), and weave them into a double helix shape. Then take a tube of decorating icing from the grocery store and use it to draw the base pairs.

I was originally going to create base pairs out of Mike 'n Ikes, but they were too fat, so I raided my supplies to find a tube of writing icing. I only had purple, but it worked. Helena's probably disappointed there's not more candy though.
She's a fan of sugar.

The cupcakes themselves are super simple, just chocolate cupcakes filled with cherry pie filling and topped with whipped cream. I decorated a few a little more traditionally with a maraschino cherry and the crumbled up cake middles mostly because I ran out of writing icing.
Don't forget to share with your sestras

Black Forest Cupcakes
Yield: 2 dozen cupcakes

Ingredients
8 oz. unsweetened baking chocolate, chopped
1 cup usalted butter
3 eggs
1½ cups sugar
¾ cup sour cream
1 tsp. vanilla extract
1½ cups flour
1 tsp. salt
1 tsp. baking powder
½ tsp. baking soda
Cherry pie filling (I used about half of a 20 oz. can)
1½ cups whipping cream
3 tbsp. powdered sugar
Maraschino cherries, to decorate
Optional decorations: Pull 'n Peel Twizzlers, writing icing

Directions
Preheat the oven to 350 degrees F. In a small saucepan over low heat, melt the chocolate and the butter. Remove from heat and allow to cool to room temperature.

In a large mixing bowl, whisk the eggs and sugar together until the sugar is completely dissolved. Mix in the sour cream and vanilla extract. Add the cooled chocolate and mix until completely combined. Fold in the dry ingredients

Line a cupcake tin with paper liners, and fill about 2/3 of the way full with batter. Bake about 18-20 minutes, or until a toothpick inserted in the middle comes out clean. Cool completely on wire racks.

Use a cupcake corer or a sharp paring knife to core the cupcakes and fill them with cherry pie filling.

In a large bowl with electric beaters, beat the cream and the powdered sugar until stiff peaks form. Use to frost the cooled cupcake. Top with a maraschino cherries and crumbs from the discarded middles, if desired.

Recipe by Kim

Things you may need (affiliate links):


March 22, 2015

The (cheese)cake is a lie: Cheesecake Stuffed Portal Cake


My brother always complains that I turned him into a cake snob. He can't help but compare any cake he eats to cake that I make, and usually finds it lacking. (Thankfully, that was not the case with his wedding cake) And heaven forbid you give that man box cake. He's so used to eating my cakes that he can immediately spot the too-sweet and artificial taste.

For his birthday I always ask him what kind of cake he wants, and he always answers chocolate. Every year. That boy loves his chocolate cake.

Chocolate cake is a simple enough request, so I kind of had to go and complicate it. See, my entire family loves cheesecake, but I never make it because I don't like it. (I have a complicated relationship with cream cheese. Cream cheese plus savory equals awesome. Cream cheese plus sweet equals gag) I thought I'd do something special this year and make him a cheesecake. I even hunted up a recipe from Junior's in Brooklyn (his fave) for a devil's food cheesecake that had a layer of cheesecake in the middle of layers of devil's food cake and chocolate fudge frosting.
I didn't use Junior's recipe for the cake or frosting, though. I used my favorite devil's food recipe instead (of course, I realized after I took the cake out of the oven that I accidentally used baking powder instead of baking soda, so the layers were pretty thin and dense). I also, umm, I sort of took a shortcut with the frosting, because I'm a terrible person and cheesecake is hard and I didn't want to wash more bowls and don't judge me.

To try and mask the flavor of shortcut frosting (and to cover the fact that I'm not good at frosting cakes), I decided to decorate the cake with crumbs-- I reserved a little batter and baked it separately, then I toasted the crumbs. It was at that moment I realized that with a little whipped cream (which I had), some maraschino cherries (which I had), and a white candle (which I didn't have, but then had to run to the store last minute and so could buy one), I could totally make it into a Portal cake.

For those of you who don't know, Portal is a video game where the main character, Chell, participates in a series of tests (the puzzles the player has to solve) and is promised cake at the conclusion of the experiment. As the game progresses, it gets weirder and darker and you find out that the cake is, of course, a lie.
Okay, so I went a little crazy on the whipped cream. Oops
The "official" version of the cake is decorated with chocolate shards and uses a tall, thin candle. I covered mine with cake crumbs and, since it was kind of a last minute decision, could not find a tall, thin candle, so I just used a taper. You can still totally tell what it's supposed to be. Right?
How did it taste? Well, I'm not the best judge on that. It could be the world's best cheesecake, and I'd still be like, meh. How about we let the birthday boy weigh in?
Thumbs up!

Cheesecake Stuffed Portal Cake
Yield: 12-16 servings

Ingredients
For the cheesecake:
3 (8 oz.) packages of cream cheese, at room temperature
1⅓ cups sugar, divided
3 tbsp. cornstarch
1 tbsp. vanilla extract
2 extra large eggs
⅔ cup heavy cream

To assemble:
Toasted cake crumbs or chocolate sprinkles
Whipped cream
8 maraschino cherries
1 tall white candle

Directions
Preheat the oven to 350 degrees F. Generously grease a 9 inch springform pan, and wrap the outside with aluminum foil.

In the bowl of a stand mixer, or in a large mixing bowl with electric beaters, beat 1 (8 oz.) pacakge of cream cheese with ⅓ cup sugar and cornstarch on low speed until creamy. Add the remaining cream cheese, one package at a time, scraping down the bowl after each. Increase the speed to medium and add the remaining sugar and vanilla. Add the eggs, one at a time, beating well after each addition. Add in the cream and beat until just incorporated. Do not over mix.

Gently spread the batter into the spingform pan. Place the pan in a large, rimmed pan (I used a foil roasting pan). Add hot water to the large pan until it comes up the sides of the springform pan about 1 inch. Bake until the edges are golden, the top is lightly tanned, and the middle still jiggles slightly when moved, about 1 hour 15 minutes. Remove the springform pan from the water bath and cool on a wire rack and cool for about 2 hours. Cover with plastic wrap and place in the refrigerator until completely chilled, about 4 hours. Freeze until use.

Prepare the devil's food cake according to recipe instructions and bake in two 9 inch round cake pans. Optional-- reserve about 1 cup of batter and bake separately to make cake crumbs cake crumbs. Cool completely.

To assemble the cake: allow the cheesecake to sit at room temperature for 10 minutes. Place one layer of devil's food cake on a cake plate and spread generously with frosting. Remove the cheesecake from the springform pan and place top side down on the frosted cake layer. Spread more frosting on top. Add the second cake layer, and frost the sides and top of the cake with the remaining frosting.

Cover the cake with the reserved cake crumbs or chocolate sprinkles, pressing them lightly into the frosting so they stick. On the top of the cake, use the whipped cream to pipe 8 rosettes evenly around the edge. Place one maraschino cherry in the middle of each rosette. Pipe another rosette in the middle of the cake and place the candle.

Recipe adapted slightly from FoodNetwork.com

Things you may need:


*Disclaimer: This post contains affliate links*
Yum Goggle Top 80 Cheesecake Recipe Roundup

October 31, 2014

Frankenstein's Monster Cupcakes


Do you guys realize that every year I've had this blog, I've done a classic horror movie monster cupcake for Halloween? Last year, I did zombie cupcakes. The year before that, I did vampire fang cupcakes. The year before that, I didn't have a blog.

This year, I knew I wanted to keep that ball rolling, so I asked a friend what monster cupcakes I should make this year. Her answer was immediate: Frankenstein.
But Frankenstein cupcakes had been done to death, and by better decorators than I. Or so I thought. Every Frankenstein cupcake I came across was abso-freakin-lutely stinkin' adorable. Don't get me wrong, I love the cute, but at Halloween, I want something a little more gruesome.

So I sat down to brainstorm. How did I do Frankenstein cupcakes that were a) a little more gruesome, and b) accessible to my general lack of decorating skills?
I went back to the monster's origins. Dead flesh stitched back together and reanimated with the use of lightning and mad science. If the monster was flesh that had been stitched together, I could take green Airheads and "stitch" them together over a cupcake. And the frosting should be red, and I could add some red dessert sauce (I used the syrupy part of cherry pie filling) to make the gaps in the "flesh" look all raw and bloody.

Yes, these are words I used to talk about cupcakes.
I had originally intended to use shoe string licorice to stitch the Airheads together, but I couldn't find any, and I didn't really want to order it online. I ended up using a tube of black gel icing from the grocery store. Cookie icing, or a small batch of royal icing would probably work better, since gel can sometimes run.

The Airheads actually ended up being a little more difficult to deal with than I thought. While they were beautifully pliable after being microwaved for a couple of seconds, they harden back up very quickly. Luckily, I wanted raggedy edges and unevenness, so it ended up working out for me, but that's something to keep in mind. And the cherry pie filling can cause the Airheads to "melt," so either add them right before serving, or skip the pie filling "blood." (You can even skip the gaps in the "skin;" it didn't end up having quite the effect I envisioned)
I also decided to buy a nuts and bolts chocolate mold so I could make the monster's iconic neck bolts. I just melted some Merckens black chocolate wafers with some Merckens super white (Merckens black is really more of a very dark brown-- Wilton's gives you a truer black but Merckens tastes so much better), and dry brushed on some silver luster dust, which made them actually look super realistic. Then I just added a touch of red gel icing around the edge for that added touch of gore. I wanted it to look like the bolts had been jammed right in.

But the decorations don't stop at the top:
I colored the cupcakes green and filled the with more cherry pie filling for added oozey gore when you bite into them.

These cupcakes were a bit time consuming, but easy enough for the novice decorator, I think. Except for the chocolate mold and luster dust, there's not a single thing I used that isn't easy to find, most of which can even be found at the grocery store. The cupcakes can be baked, filled, and frosted ahead of time, too.

Cupcakes: I used my Birthday Cake Cupcakes, but Almond cupcakes would go really well with the cherry pie filling
Frosting: I used the same recipe from my Zombie Cupcakes, just added a little raspberry extract (because I thought it would go with the cherry and the watermelon Airheads) and a little whipping cream.
Filling/Blood sauce: Canned cherry pie filling
Skin: Watermelon Airheads. I liked the color of the watermelon better, but Green Apple would also work
Stitches: Black gel icing (royal icing might work better)
Bolts: Black and super white Merckens wafers, melted and poured into this nuts and bolts chocolate mold, and brushed with silver luster dust
*Disclaimer: This post includes affiliate links*

December 22, 2013

Icicle Candy and Reindeer Snacks #SundaySupper

This week's #SundaySupper is all about holiday music, movies, and TV specials.

I'm not gonna lie, my first instinct was to go with the Doctor Who Christmas specials, but short of a gingerbread TARDIS, there was nothing I could think of for it. And I didn't want to make a gingerbread TARDIS. So I went with my second instinct: cheesy, kiddie, made-for-TV Christmas movies. Not the Hallmark ones, because those try too hard and are unnecessarily dramatic and have no fun things to distract me from the gaping plot holes. No, I mean the ones meant for small children. The ones with magic and reindeer and Santa Claus.

My favorite in this genre is a movie called Snow. It's about Nick Snowden, a man approaching his first Christmas as the "big SC," who lost one of his reindeer, Buddy, and has to rescue him from the zoo before Christmas Eve, or Christmas will be ruined forever.

I can't say what it is about this movie that I like so much. There's storyline inconsistencies, plot devices that don't make a whole lot of sense, and they do over-cheese a couple of scenes, but I just love it. It might just be a case of the right actors with the right script, but there's just something very charming and very real about it.
It could also be that I totally get the main female lead, Sandy. I'd totally fall for Tom Cavanagh's awkwardly charming Nick, too. And there's that scene when he's on the ladder, and she gets caught looking that I think really sets her apart from others in the holiday-movie-female-lead category. Anyway, if you can catch it on ABC Family, I recommend it. And the sequel, though that has some larger plotholes.

Since the movie is meant for children, there's obviously no cursing. In fact, all of Nick's curses are holiday terms. Including when he says, "oh, icicles."
When I thought to make icicle candy, it sounded a lot better in my head than it actually was in practice. First I tried a recipe that used the microwave, no special tools required. My microwave is apparently super powered, because I burned the sugar. Badly. It was the color of coffee. Strong coffee.

So I tried this recipe(halved) from Martha Stewart. Much harder, since it uses pulled sugar, but more reliable. Let's just say, it was the first and last time I will ever work with pulled sugar. It was a pain to work with. And painful to work with. I had on some heavy duty rubber gloves, the kind that I use when washing dishes in scalding water, and my fingertips are still red and sensitive. Plus, I only got one good looking one. I was using some expletives a lot stronger than icicles, if y'know what I mean. I did get one, so it wasn't a total fail, but I do not recommend it unless you've got seriously tough hands made out of asbestos or something.
Of course, I couldn't forget about Buddy, since the movie would have never happened if he hadn't wandered off and got captured by Buck, the jerk poacher with a thing for Sandy (that apparently thinks giving illegal reindeer to her zoo is a good idea? They never really explain that). In Snow, it's Buddy's first Christmas too, but he hasn't yet learned to fly (which is why he needs Nick's help to escape from the zoo), but as he's learning, he leaps over the fence to steal a chocolate bar from the security guard. But in the sequel, Buddy's having some trouble fitting into his harness, so Nick puts him on a diet and exercise plan.

These "reindeer snacks" are actually chocolate cherry almond granola clusters, which would be a great way to satisfy Buddy's sweet tooth while giving him the energy to hoof it up on the treadmill. Reindeer like oats and plus, I think even Santa would enjoy the (slightly) healthier, but still sweet and tasty, break from all the milk and cookies.

Full disclosure: this was not supposed to be chocolate granola. I was following my patented I-don't-need-no-stinkin'-recipe method, and I added chocolate chips, not thinking that all the way through. When I went to stir the granola, it became chocolate granola. And I might be breaking some cardinal granola rules with my haphazard method, but I haven't been able to stop eating it, so I don't think I really care.
Chocolate Cherry Almond Granola Clusters
AKA Reindeer Snacks

Ingredients
1½ cups old fashioned oats
¾ cup sliced almonds
½ cup semisweet chocolate chips
½ cup dried cherries
¼ cup packed brown sugar
½ tsp. salt
⅓ cup agave nectar (maple syrup would also work)
2 tbsp. nut butter (almond, preferably)
1 tbsp. canola oil
1 tsp. vanilla extract
1 tsp. almond extract

Directions
Preheat the oven to 300 degrees F. Line a rimmed baking sheet with parchment paper or a silpat mat.

In a large mixing bowl mix together the first 6 ingredients. In a separate bowl, whisk the remaining ingredients together until smooth (warm the nut butter to make this easier). Pour the wet ingredients over the dry, and mix until well coated. Spread evenly onto the prepared pan.

Bake for 10 minutes, then stir until the chocolate is evenly distributed. Bake for another 20 minutes, stirring every 10 minutes or so, until the oats are toasted and fragrant. Shape into clusters of the desired size, and allow to cool completely on the pan.

Recipe by Kim
Thanks to Tammi from Momma's Meals for hosting this week. Comes see how the rest of the #SundaySupper crew is getting into the holiday spirit:

Party Appetizers & Snacks:
Oven-Roasted Applesauce Scented with Rosemary & Vanilla-Inspired by the song "Christmas in the Trenches"- Shockingly Delicious
Roasted Chestnuts Inspired by the movie "The Christmas Song" - Food Lust People Love
A Popcorn Trio Inspired by the song "Let it Snow" - Hot Momma's Kitchen Chaos
Chai Tea Abominable Snow Buddies Inspired by the movie "Rudolph" - Cupcakes & Kale Chips 
Raisin Bran Muffins for a Crowd Inspired by the movie "National Lampoon's Christmas Vacation" - In The Kitchen With Audrey and Maurene
Icicle Candy and Reindeer Snacks Inspired by the movie "Snow" - Treats & Trinkets
A Christmas Carol Plum Pudding Inspired by the movie "A Christmas Carol" - No One Likes Crumbley Cookies 
Yukon Mashed Potato Cakes Inspired by the movie "Rudolph" - Cookin' Mimi
Christmas Pudding Inspired by the song "Over the River and Through the Woods" - A Kitchen Hoor 
Pumpkin Pudding Inspired by the movie "Nightmare Before Christmas" - Basic N Delicious
Elf-Inspired Christmas "Grams" Inspired by the movie "Elf" - MarocMama 
Sugarplums Inspired by the movie "The Nutcracker" - Happy Baking Days 
Chai Spiced Roasted Nuts Inspired by the song "Chestnuts Roasting on an Open Fire" - Take A Bite Out of Boca

Festive Main Dishes
Maple Syrup Spaghetti- Inspired by the movie "Elf"- Momma's Meals
Who Hash Inspired by the movie "How The Grinch Stole Christmas" -girlichef 
Ginger Orange Glazed Cornish Hens Inspired by the song "The 12 Days of Christmas" -Sue's Nutrition Buzz 
NY Hot Dog with Sabrett-style Onion Sauce Inspired by the movie "Die Hard" - Small Wallet, Big Appetite 
Classic Caesar Salad Inspired by the movie "The Santa Clause" - The Little Ferraro Kitchen 
Individuals Meatloaves & Horseradish Mashed Potatoes for Mommy's Little Piggies - Inspired by the movie "A Christmas Story" - The Not So Cheesy Kitchen 
Christmas Waffles Inspired by the TV special "A Claymation Christmas Celebration" - Curious Cuisiniere
Filthy Animal Pizza Inspired by the movie "Home Alone" - Foxes Love Lemons
Chicken Orzo Soup Inspired by the song "12 Days of Christmas" - Family Foodie
Brandied Candied Sweet Potatoes Inspired by the song "Christmas Is The Time To Say ‘I Love You’ " - Cindy's Recipes and Writings

Sweet Holiday Treats:
Gin and Tonic Cupcakes Inspired by Adam Sandler's " The Chanukah Song" - The Girl In The Little Red Kitchen
Chocolate Chip Shortbread Bars Inspired by the movie "Love Actually" - Magnolia Days 
Gingerbread Marshmallows Inspired by the song "Marshmallow World" - Jane's Adventures in Dinner
Hazelnut Chocolate Chip Cookies Inspired by the movie "The Gremlins" - Killer Bunnies, Inc 
White Chocolate Peppermint Fudge Inspired by the song "I'm Dreaming of a White Christmas" - Alida's Kitchen 
Snowball Cookies - Inspired by the movie "White Christmas" -The Foodie Army Wife 
Penuche Fudge Inspired by the movie "Elf" - Pies and Plots
Hot Chocolate Cookies Inspired by the movie "Santa Clause" - Mess Makes Food
South Pacific Coconut Tres Leche Cake Inspired by the movie "South Pacific" -The Ninja Baker 
Cookies & Cream Fudge Inspired by the movie "Elf" - The Messy Baker

Cozy Drinks:
Toasted Coconut Hot Cocoa- Inspired by the song "Let It Snow"- Chocolate Moosey 
The Christmas Gram Inspired by the movie "Elf" - An Appealing Plan 
Eggnog Hot Chocolate Inspired by the movie "National Lampoons Christmas Vacation" - Peanut Butter and Peppers 
Vermont Hot Cocoa Inspired by the movie "White Christmas" - Kudos Kitchen By Renee
Spiked Hot Chocolate Peppermint Ice Cream Floats Inspired by the song "Holly Jolly Christmas " -NeighborFood
Sunday Supper MovementJoin the #SundaySupper conversation on twitter on Sunday! We tweet throughout the day and share recipes from all over the world. Our weekly chat starts at 7:00 pm ET. Follow the #SundaySupper hashtag and remember to include it in your tweets to join in the chat. Check out our #SundaySupper Pinterest board for more fabulous recipes and food photos.

Would you like to join the Sunday Supper Movement? It’s easy! You can sign up by clicking here: Sunday Supper Movement.

September 25, 2013

Cherry Almond Oatmeal Cookies


So, I made a thing. And I guess people liked the thing? So I'm sharing the thing.

I always forget that there's something fundamentally weird about the way I develop recipes. Like how "develop" is a pretty generous word for what I do. And being in the foodie blog world, I forget that developing recipes isn't actually a thing that most people do. When most people go to bake cookies, they usually already have a recipe that they then follow. I don't always follow the recipe, even when I start with one. And, especially since starting this blog, I often don't even start with a recipe.
So when this weekend I used my patented recipe development process to bake cookies for my cousin's graduation party (I know it's September. I know normal people don't have graduation parties in September, but I never claimed we were normal people), I was a little blown away with the reaction these cookies got. I mean, they're pretty good cookies, and I guess they're not exactly a common sort of flavor, but like, whoa, these cookies were completely inhaled, and then raved about. And a lot of people kept asking me how I do it.

I'm glad that people usually ask me that after they try my recipes, because my usual answer of "throwing ingredients into the mixer until it looks like cookie dough and then praying to Betty Crocker it comes out edible" doesn't really inspire confidence.
So making these cookies was like making up any other cookie recipe, except I was a little more limited in terms of ingredients, since my cousin has a wheat allergy, and I was out of gluten free flour mix. I'm not one of those bakers with all the weirdy flours lying around the house, but I did have almond meal and oats. Those, I could work with. Now, you can buy oat flour, but it's easy enough (and probably cheaper) to just pulverize uncooked oats in a food processor. My food processor is small and inexpensive, so I didn't bother trying to get a fine grind. My cookies ended up having more of an oat-y texture, which no one seems to have a problem with, but if you have a fancy food processor, you could probably get a smoother texture.

I've recently become enamored of the cherry/almond flavor combination, so when I found half a jar of maraschino cherries in the fridge, that was happening.

I did have to add a little xanthan gum, since the dough was not binding the way I wanted it to, and I was so paranoid about the cookies coming out dense and dry, I didn't want to add more oats. Almond meal doesn't absorb liquid very well, but I originally thought the oat flour would balance that out. You might be able to get away with using corn starch instead, since oat flour's usually okay without the gum, and egg whites work well as binders. I haven't tested it though, so don't come crying if it doesn't work.

(Xanthan gum is often used to replace gluten as a binder/thickener. You can usually find it in health food stores or any store that has a large selection of gluten free baking supplies)

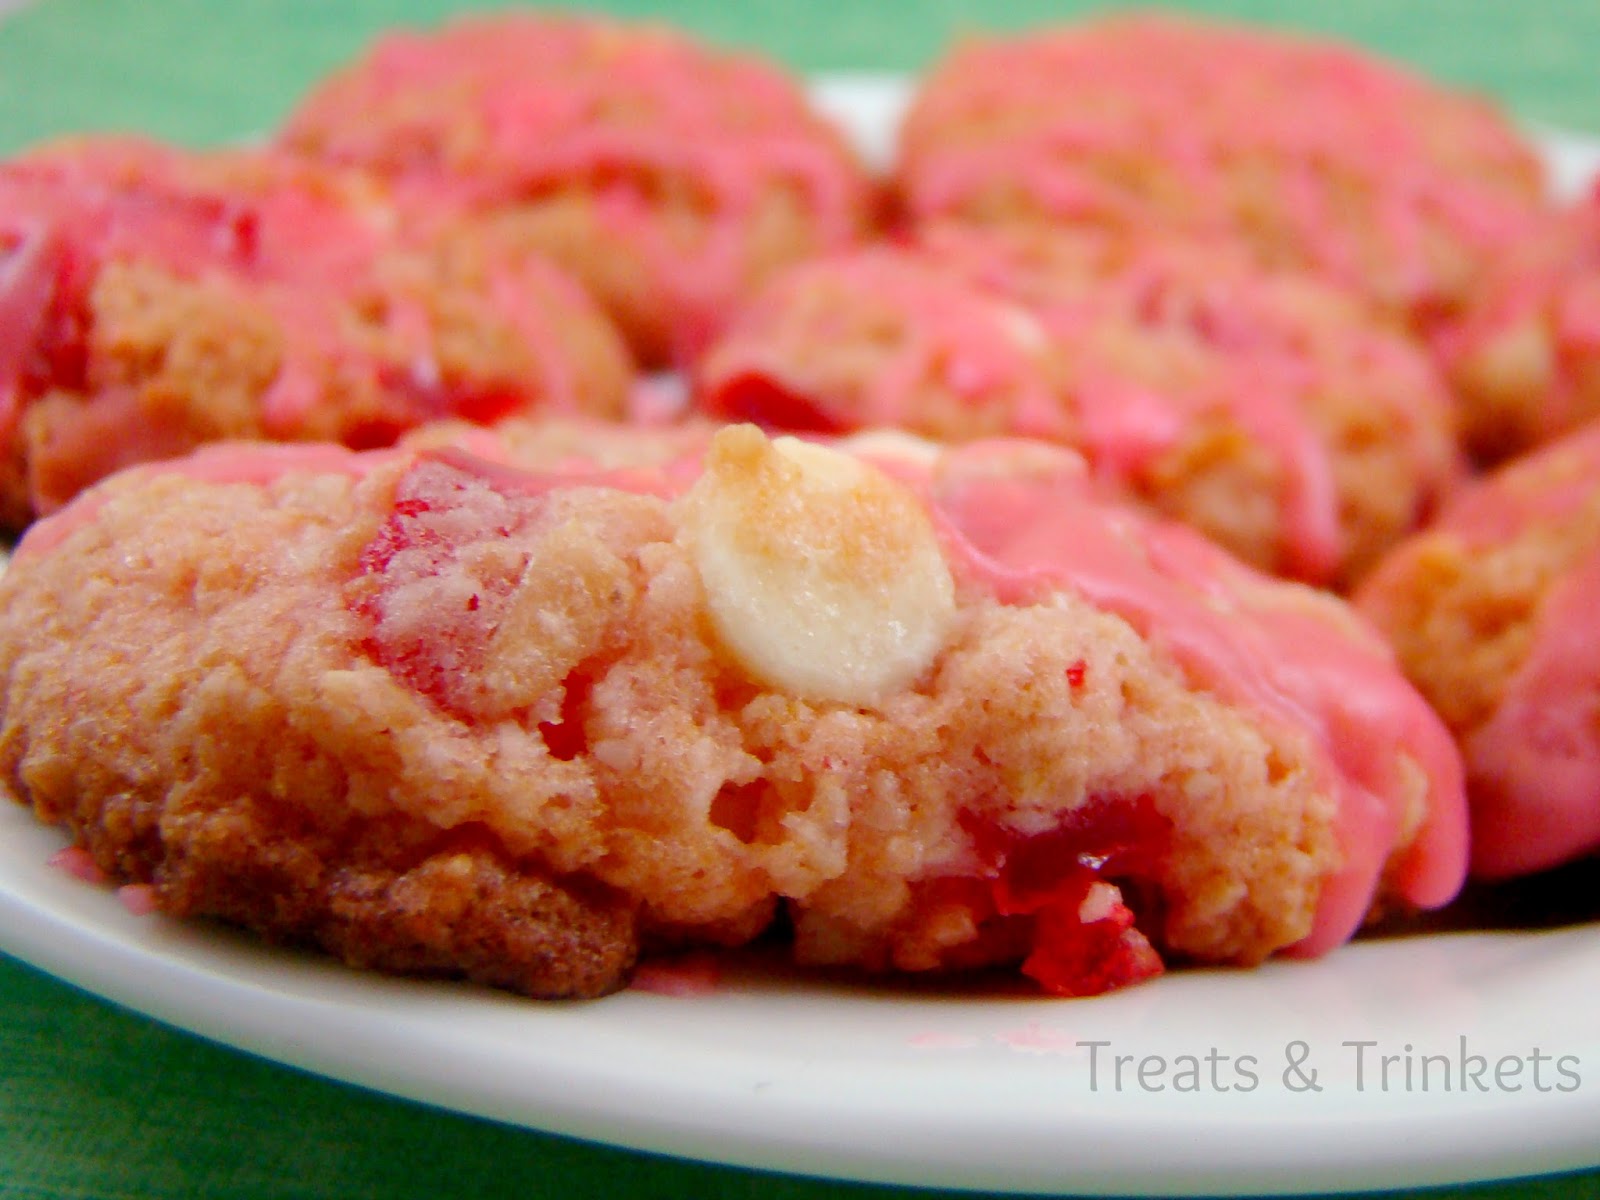
Then I just mixed in the diced cherries, and some vanilla chips (white chocolate also work). But they were kind of ugly when I took them out of the oven, so I mixed up some maraschino cherry juice and powdered sugar, with just a drop of almond extract, and made a pretty pink glaze that I then used to doodle on top of the cookies. (I don't drizzle; I doodle)
So that's how these cookies came to be. When I tasted them, I thought, "hmm, not too shabby." But my focus group was slightly more effusive. They have a great flavor, without having any weirdy gluten-free texture. They're best eaten day of baking, since they get a little soft afterwards, but if I hadn't kept some for myself at home, I wouldn't know that. Not even the crumbs were left behind.

Cherry Almond Oatmeal Cookies
Yield: 32 cookies

Ingredients
1¾ cups almond meal
1½ cups oat flour*
1 tsp. baking powder
1 tsp. xanthan gum
¾ tsp. salt
½ tsp. baking soda
¾ cup sugar
½ cup (1 stick) unsalted butter, at room temperature
2 egg whites
2 tbsp. maraschino cherry juice
½ tsp. vanilla extract
¼ tsp. almond extract
¾ cup diced maraschino cherries (about half a jar)
¾ cup vanilla chips (or white chocolate chips)

For the glaze(optional):
1 cup powdered sugar
3 tbsp. maraschino cherry juice
Splash of almond extract

Directions
Preheat the oven to 350 degrees F. In a mixing bowl, mix together the almond meal, oat flour, baking powder, xanthan gum, salt, and baking soda. In the bowl of a stand mixer, or in a separate bowl with electric beaters, cream the butter and sugar together at medium speed until fluffy (about 5 minutes). Add the egg whites, cherry juice, and extracts, beating well after each addition. With the mixer on low speed, gradually add in the dry ingredients, scraping down the sides of the bowl as needed, until a batter forms. Fold in the diced cherries and vanilla chips.

Drop the batter by rounded tablespoonful on a cookie sheet lined with parchment paper or a silpat mat, about 2 inches apart. Bake 10-12 minutes, until the edges are a golden brown. Let cool on the pan for 5 minutes before removing to a wire rack to cool completely.

If desired, mix glaze ingredients together until smooth. Drizzle over the cooled cookies. Let dry before serving.

Tip: Make sure to use certified gluten free oats if making for someone with an allergy or intolerance.

*To make your own oat flour, pulse uncooked rolled oats in a food processor until it looks like flour

Recipe by Kim

September 11, 2013

Chocolate Cherry Push Up Cake Pops


You guys, me and cake pops do not get along.

First, the texture: they're basically soggy cake. It's cake crumbs, mixed together with a ton of frosting. It's mushy, and not in a good way like icebox cakes.

Secondly, the taste: they're too sweet. You've already got like a 1:1 cake to frosting ration, and then you dip it white chocolate candy melts.I may have a sweet tooth, but I don't like my sweets overly sweet, you know?

Thirdly, construction: they're fussy. Remember the Mr. Potato Heads I made for baby CC's first birthday party? Remember how it took me four and a half hours just to construct 19 of them? That doesn't include baking and cooling and chilling times. First you gotta bake the cake, then you gotta let it cool, then you crumble it, then you mix the crumbs with frosting, then you shape it all into balls, then you chill it, then you dip them in candy melts- and make sure you're super gentle when tapping off the excess, or it will fall off and you have to start all over again- then you have to decorate them. No thank you please!

But what I can't deny about cake pops is the wow factor. They're adorable. And it doesn't take much decorating skill to make them look decent, either. Let's face it: Everything's cuter on a stick.
Well, I've found the solution to my cake pop dilemma: push up cake pops. They're just like the push up ice cream pops you used to get as a kid from Annie the ice cream lady, but with cake and frosting instead. They're super easy, no special skills required, totally simple to put together, and still have the wow factor of cake on a stick. Plus, they're completely self-contained (the containers come with little tops), so they're even easier to transport than cupcakes. And where cake pops are one bite of soggy cake dipped it white chocolate, these are full, satisfying portions of cake, with a much better frosting-to-cake ratio, in my opinion.

Of course, you can use as much or as little frosting as you like. You're not making weirdy moldable cake mush; no one has the right to dictate just how much frosting you use!

Unless you run out. Then you're SOL.
Obviously, these do take one special piece of equipment: the push up pop containers themselves. I dithered for a while over whether or not to buy them, as I had no clue how often- if ever!- I'd use them, and single purpose items like that always make me hesitate. But because I'm me, and I'm easily swayed by cute things, I bought them. Because LOOKIT TEH CUTE!!!

And simple, oh-so simple. You just bake the cake in a jelly roll pan (or if you're me, and don't have a suitable jelly roll pan, you bake it in regular layers then split the layers) because you want it on the thinner side. Then just use the containers themselves to cut the cake into little circles. And then this gives you cake leavings to nom upon. (I'm reeeeaaaallllly tired right now, does it show? Nah)

Then you layer: cake, frosting, cake, frosting, cake, frosting, and a cherry on top. I didn't even use a tip to pipe in the frosting because it got smushed anyway. Just put it in a zip-top bag, snipped a corner, and squished it out.

If you like more frosting-to-cake, you might want to only put 2 layers of cake in the pops. As it was, the cherries got a little squished when I put the tops on. And brought them to baby CC's 2nd birthday, because I'm consistent like that.
You can buy the containers here. This is the same brand I used, and they work great. And they have new, taller tops, so no squished cherries for you!

Chocolate Cherry Push Up Cake Pops
Yield: About 12 pops

Ingredients
1 recipe Devil's Food Cake, or your favorite chocolate cake
3/4 cup unsalted butter, softened
2 cups powdered sugar
1/4 cup maraschino cherry juice
1/4 tsp. almond extract (optional)
12 maraschino cherries

Directions
Bake the cake as directed in a jelly roll pan* and allow to cool completely. While the cake is cooling, prepare the frosting: beat the butter with electric beaters on low speed. Gradually add in the powdered sugar. Add the cherry juice and almond extract. Gradually increase the speed to high, then whip until light and fluffy. Place in a pastry bag or zip top bag, and snip the corner

Using the pop molds, cut the cooled cake into small circles. Add the first layer of cake to the mold, then pipe the frosting on top. Continue to layer with cake and frosting until you reach the top of the mold, ending with the frosting. Top with a maraschino cherry.

Tip: Place the pop molds in a piece of Styrofoam to keep them upright while frosting. I was also able to use my cooling racks to do the same.

*Or bake in regular layers, then split in half with a sharp, serrated knife after cooling

Recipe by Kim

July 10, 2013

Black Forest Icebox Cake


We've been having a heat wave over in New Jersey. It's been so hot, I haven't wanted to turn the oven on. And that's like, me not wanting to bake? Inconceivable!

(You keep using that word. I don't think it means what you think it means.)

But I had to satisfy my dessert-making cravings somehow, and since my ice cream maker was ousted from the freezer because of a lack of room, that meant ice cream was out of the question.

So what's a girl to do but make her most favoritest no-bake treat in the whole wide world? That's right, it's time for icebox cakes!!

YAAAAAAAAAAAAAAAAAY!!!!!!!!!!!!!!!!!! *Kermit flail*
(Sometimes I worry about how much I love these things. Then I make one and worry about how little I loved them before.)

I've been playing around with the idea for a Black Forest icebox cake for a while. After all, what is Black Forest Cake, but chocolate cake, cherry filling, and whipped cream? Replace the chocolate cake with chocolate cookies, stick it in the refrigerator for a few hours, and you have an icebox cake. I haven't made it before now because I kept forgetting to buy canned cherries (easier to make a filling with, and fresh cherries don't last long enough in my house to make something with) (you could use cherry pie filling, but the canned stuff is too bright and tastes artificial, and as for making my own, see the previous parenthetical comment.)
Normally I go to the park or take a walk or sit outside and read on my lunch break, but it was way too hot for any of that this past week. And since there is a grocery store a short drive from my office, what better way to spend the time than buying ingredients for an icebox cake?

I have to say, though, that grocery store is big and clean and nice and has a great salad/hot food bar, and all sorts of organic and specialty diet options, so it totally lulled me into thinking that it would have a great selection for scratch cooks.

It does not. It is a grocery store for hipsters who like to pretend to be all gourmet and up on foodie trends and eco-friendly, but don't actually like to cook. The baking aisle is so limited (mostly mixes, to be honest), and they didn't even carry unflavored gelatin until recently. Nor could I find plain chocolate wafer cookies. They had Oreos and off-brand Oreos galore (though not much in the way of other cookies), but not plain wafers. What is up with that?
I ended up getting chocolate graham crackers. Those, at least, they had, and I did not fancy baking my own or scraping the filling out of the Oreos. And I ended up really liking the graham crackers. I think the chocolate ones taste more cake-like after softening than the regular grahams, too.

I also added a little red wine to the cherries, because the cherries are traditionally soaked in kirsch for Black Forest cake. I do not have kirsch, but I had a bottle of Malbec with only a little bit left in it. This was a last minute decision, and totally optional
There's no point to ganache if you don't let it drip down the sides.
And because I'm fancy, I poured some ganache on top. And then I let the rest set, whipped it, and piped ganache rosettes, so the cherries on top would have little chocolate thrones. And ended up with the PRETTIEST CAKE EVAAAAAAA!

And tastiest. Because you can't go wrong with cherries, chocolate, and whipped cream. And you can NEVER go wrong with an icebox cake. Word.
Black Forest Icebox Cake
Yield: 8-10 servings

Ingredients
For the cherry filling:
1 (15 oz.) can sweet cherries in heavy syrup
1/4 cup fruity red wine (optional)*
2 tbsp. cornstarch
2 tbsp. sugar

For the cake:
1½ cups whipping cream, chilled
1½ tbsp. sugar
½ tsp. vanilla
1 box chocolate graham crackers or chocolate wafer cookies

For the ganache:
6 oz. milk chocolate, chopped**
6 oz. heavy cream

Chocolate sprinkles, and more cherries, for decorating

Directions
Prepare the filling: Dice the cherries into quarters. Add all ingredients to a saucepan. Heat on low, mixing until the sugar and cornstarch are dissolved. Continue to heat until the mixture is thickened and can coat the back of a spoon. Remove from heat and allow to cool completely.

Prepare the cake: In the bowl of a stand mixer, or in a large mixing bowl with electric beaters, whip together the whipping cream, sugar, and vanilla on high speed until stiff peaks form. Line a loaf pan with plastic wrap. Spread some of the whipped cream evenly in the bottom of the loaf pan, about ¼ inch thick. Place a row of graham crackers over the whipped cream, filling as much space as possible. Spread a layer of cherry filling on top. Top with another layer of graham crackers and spread with more whipped cream. Repeat, alternating between the cherry filling and whipped cream until the top of the loaf pan is reached, ending with the whipped cream. Refrigerate 4-6 hours or overnight.

Prepare the ganache: Place the chopped chocolate in a medium-sized mixing bowl. In a small saucepan, heat the cream over low until boiling, stirring occasionally to prevent a skin from forming. Pour the cream over the chocolate. Allow to sit for a few minutes, then stir until the chocolate is completely melted and smooth.

Assemble: Invert the loaf pan over a serving dish to release the cake (it should pop right out). Frost the sides with the remaining whipped cream, decorate with sprinkles, if desired, and pour about 1/2-2/3 of the ganache on top. Allow the remaining ganache to come to room temperature (it seem solid), then whip on high with an electric beater. Pipe the whipped ganache on top of the cake in rosettes, then top with more cherries. Serve chilled.

Tip: You can also make a freeform cake. Just line the serving dish with graham crackers and layer from there.

*Traditionally, the cherries for Black Forest Cake are soaked in kirsch. I did not have any, so I used wine instead. Feel free to skip.

**I originally used bittersweet chocolate, but it overpowered the cake. Milk chocolate has a much milder flavor. However, feel free to use your favorite

Recipe by Kim

This recipe is featured on Foodie Friends Friday Linky Party